Building a Weather Camera
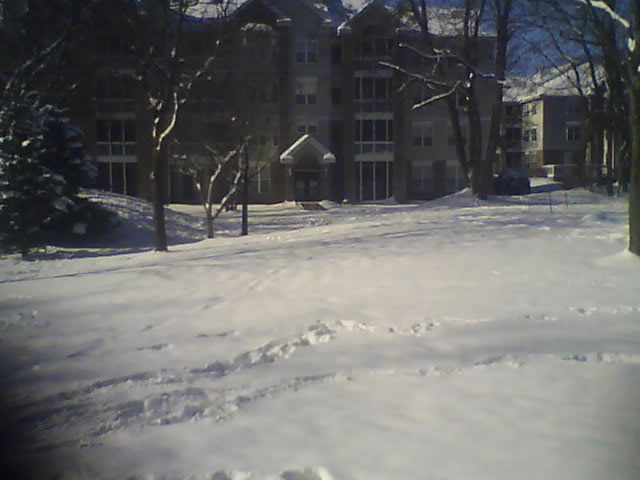
Feb 27, 19 website, and weatherPrior to moving to California, I used to have a “weather camera” that kept an eye on the current weather in Wisconsin. It was really a pleasant image, whether the ground was covered in snow or lush grass:
For this, I used a Netgear security camera that was pretty plug and play, however it no longer boots–I think eight years was its limit. There was additionally an annoyance with it I could never resolve through updated firmware, reset firmware, or changed settings. I used the option to upload a snapshot via FTP after a predetermined time interval. It would often only upload half an image (with the other half no data) like the upload job did not wait for a photo to finish saving prior to upload! My aggravation never reached a boiling point, though, as I didn’t seek out an alternative. I’m still torn whether to say good riddance or good rest to it.
With some free time in California, I decided to get this feature back up on the site by rolling my own software solution using off-the-shelf components.
Camera Hardware
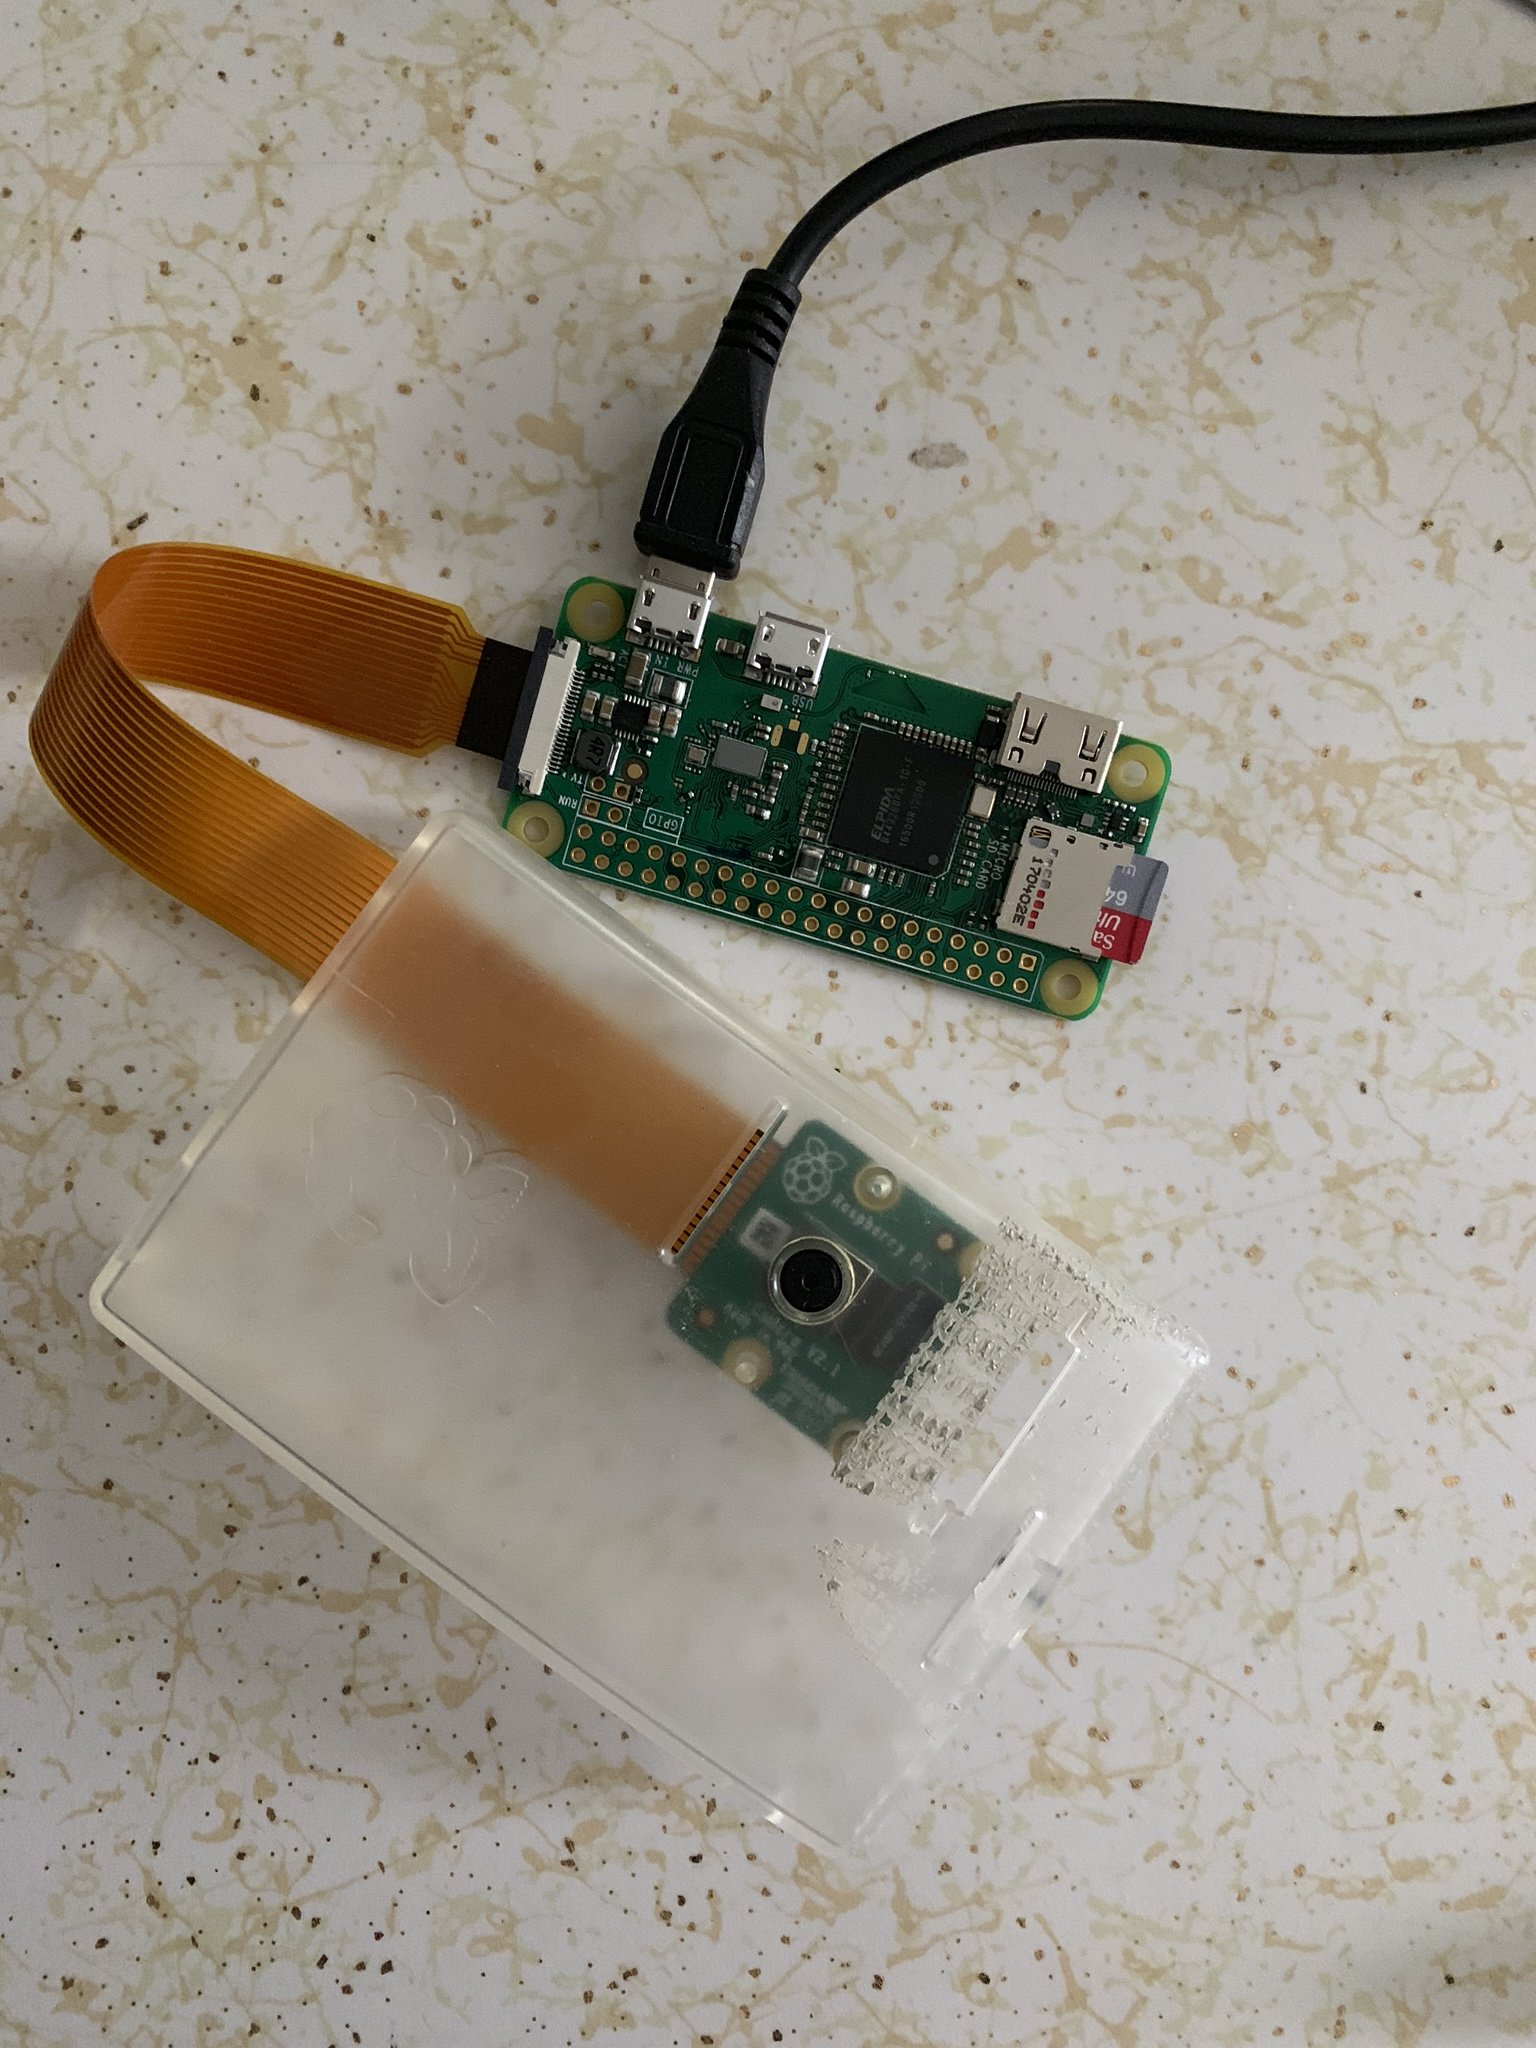
I have more than a few Raspberry Pi Zeros sitting around my apartment, and many of them are just collecting dust. I discovered there is a Raspberry Pi manufactured camera that plugs directly into the Pi Zero (with a small adapter cable), so I picked two up at MicroCenter: one with the IR filter and one without the IR filter (we’ll save the other for some NDVI tests in the future). The cable from the camera fits very snugly into the Raspberry Pi board port, so it’s not as delicate as it looks. Also, I hadn’t even noticed when I bought it, but my case has a slot perfect for mounting the camera, which is probably fully intentional by the vendor and just a complete oversight by me.
Accessing the Camera Programmatically
Since the camera is distributed through Raspberry Pi, they already have a great software interface available through Python. All you have to do is from picamera import PiCamera; camera = PiCamera() and you have instant access. Using the camera.start_preview() command, you can access a live shot of the camera immediately.
The way the mount is configured, my Raspberry Pi actually sits on its side, which means the camera also is on its side. We can modify the image so that it isn’t sideways by camera.rotation = 270 and then ensuring it isn’t reversed by camera.hflip = True.
It’s a fairly trivial process to save an image too: camera.capture('/tmp/test.jpg'). Here’s my full taking a photo script:
# -*- encoding: utf-8 -*-
# CC0 license, Ethan Nelson
# Tested on Raspberry Pi 3
from picamera import PiCamera
camera = PiCamera()
camera.rotation = 270
camera.hflip = True
camera.capture('/home/pi/photo.jpg')
Updating the Image Online
Originally, I had planned to use Python with a sleep timer for my full implementation. This would be fine if I was on a shared hosting web server with FTP enabled and configured already. My current website infrastructure is an EC2 instance and I’m not really interested in setting up SFTP or FTP as I’ll probably inadvertently leave open access (and why increase the space of possible attacks?). Instead I chose a bash script that is run with a cronjob.
First, the bash script. We need to do two things: take and save the photo, then upload it to the server. ssh provides a nice avenue for doing this programmatically since we can exchange the ssh key and not require interactive login. The keys are generated on my Raspberry Pi using: and then uploaded to my webserver: scp -i auth.key .ssh/ ubuntu@XX.XX.XX.XX. Note I do this because I rather not have my key managed by Amazon sitting on my Raspberry Pi. Now we have all the pieces to build the script:
#!/bin/bash
# CC0 license, Ethan Nelson
python /home/pi/take-photo.py
scp /home/pi/photo.jpg ubuntu@XX.XX.XX.XX:/home/ubuntu/websites/ethan-nelson.com/build/weatherimages/photo.jpg
Next, we need to configure cron to run the script at a given interval. Because I’m not on a free bandwidth host, I’m going to dial this down from what used to be three seconds on my old shared host to 60 seconds now (the weather in California really doesn’t change that much that fast anyway). If we limit this to daylight hours, that’s approximately 14 hr * 60 min / 1 hr = 840 photos * 400 kb = 336 Mb * 30 days = 10 Gb a month. Good thing ingress bandwidth is free! Anyways, here’s the cron configuration (set with crontab -e):
* 06-20 * * * /home/pi/run-photo.shClosing
Check it out live here!
The Pi Zero runs about $10 assuming you can format NOOBS on a SD to install Raspbian; otherwise, check out a starter kit that has all that set. The Pi camera is $15 on sale or $20 otherwise and includes a cable. The cord and case were a bundle for $10. That’s about $45 with tax for a remote observation camera that you have full control over. I have similar hardware kits built for home security cameras, but the caveat for these to be useful is that your ISP must not block remote access.